|
|---|
![]()
Houdini Dynamics and Effects Python Driven Rubik Cube |
|---|
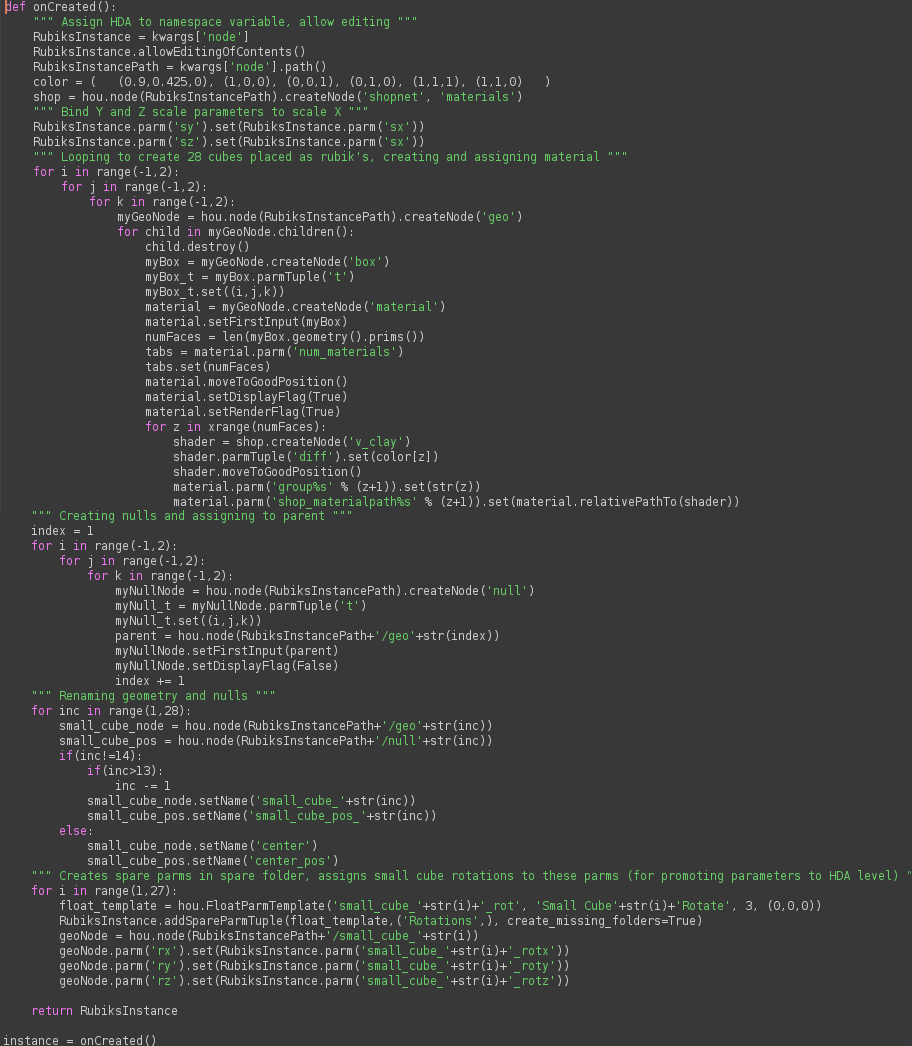
With Houdini, a user has access to a robust library of python programming implementation. This document summarizes and displays the scripts used to create a Rubik Cube Houdini Asset that is rigged and ready for play. All nodes and functionality are born from script. In this workflow, two seperate python modules are written. 1. With Houdini's event handling clause, the first module defines a function that is called on creation (the setUp() function: Figure 03). This function creates, rigs, and assigns shaders to the digital asset. 2. The second module defines the function that drives the rotation. The analysis of geometry placement determines translation behavior. |
|
|
|---|---|---|
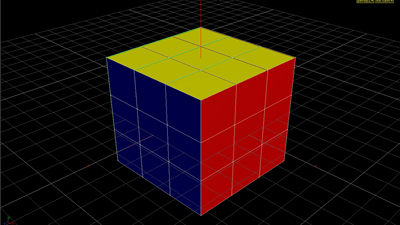
Figure 01 exhibits the result of the rubik's python project. Click the caption to jump to NTSC quality render. The sequence was animated in only a few minutes. This scripting workflow with Houdini is what enables such quick and easy animating. |
|
|
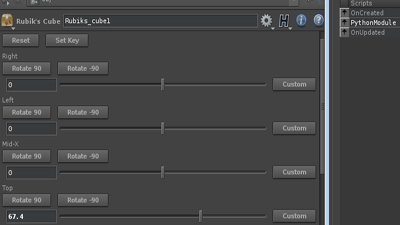
The scripting tab provides event clauses. The onCreated event creates a python module that will run whenever the HDA is dropped to a scene. This event clause is the ideal condition to run a setUp module. This module will create the contents of the digital asset. |
|
|
Comments provided inside the script will assist in explaining the order and functionality of the module. One note to consider is the three nested for loops that create the twenty-seven boxes that consist of the rubik's cube. Three nested loops are used instead of a single for loop. A rubik's cube consist of three 3x3 grids stacked atop eachother. The three nested for loops allow for box creation mimicking this fashion. This allows for the iteration variable (i, j, or k) to be used not only for iteration, but also parameter for box translation values. |
|
|
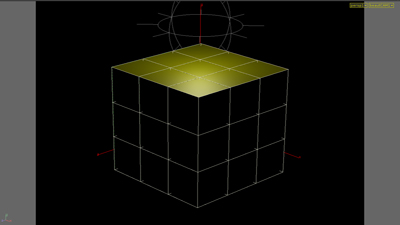
The second module contains the functions required to perform the rigged translation and rotation operations, and assign keyframe methods to a parameter button at the HDA level. A series of different functions are called to a master rotation() function. It is this function that is called on call-back scripts in the HDA parameters tab in Houdini. The rotation() function reads three parameters: The HDA instance (so paths are relative), the axis of rotation (after all, a rubik's cube can only be rotated on one axis at a time), and the degree of rotation (rotate clockwise or counter clockwise, 90 degrees or any other integer degree). Click thumbnail or here for full script |
||
Note: The scripts can be improved. In the onCreated() function a new material is made for each geometry node. An improvement would be to loop instead only six materials and assign them to the geometry. Other improvements would be switch node implementation, so that the primitive boxes can be replaced with modeled, higher poly-count polygons. |
|