|
|---|
![]()
Renderman User Documentation Smoke Atmosphere Shader with Renderman for Maya |
|---|
On an earlier page, the volume shader component was explored and tested. In this write-up, additional steps are taken to create a volume shader that can be implemented into an animation sequence. For a quick review, volume shaders are not the same as surface shaders. However when added to a mesh's shading group, they can alter an objects opacity and color. For this page, an atmosphere volume shader will be implemented into a Maya scene using RMS. |
|
|
|---|---|---|
|
|
|
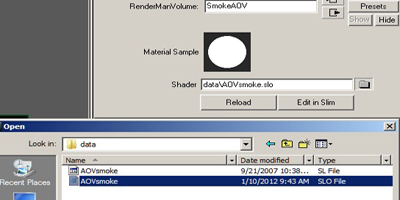
The smoke.sl volume shader being used includes raymarching. A process where rays 'step' from the rendering camera to renderable objects. This method incorporates raytracing and can be expensive if poor choice in shader variables are chosen. Activate raytracing from global setting > features tab. On to Rman. Figure 03 displays a snipet of the smoke.sl. Click the image for the entire example. Compile the code with shader.exe. In Maya's hypershade, create a Render Man Volume node from the node list. The resulting shader is empty, click the open folder in attribute editor and attach the smoke.slo - Figure 04. |
||
|
|
|
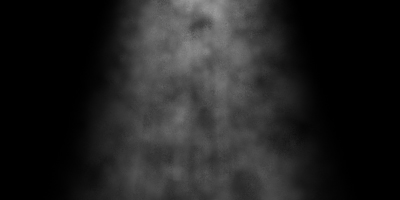
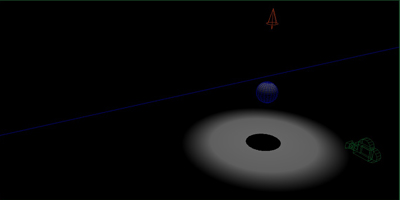
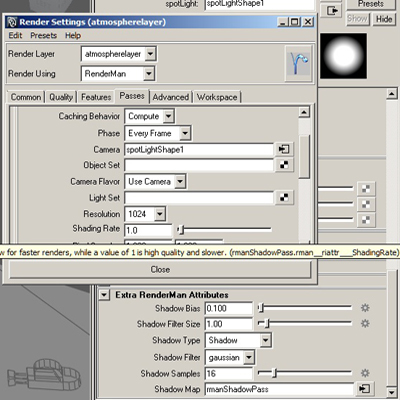
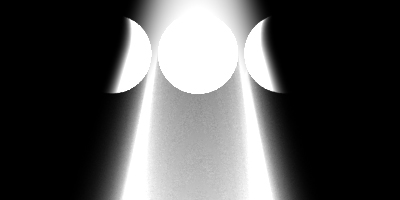
Since the volume will only render in lit areas, a few different aesthetics become available for use. The first is 'God rays,' the visualization of beams of light as they project forward. Objects in the path of emitting light will break beams appropriately. For this to happen, the lightsource must emit shadows. Instead of relying on Rman's implicit shadow pass, create an explicit shadow pass for the smoke-emitting volume - Figure 05. In order to create the light ray's trailing shadow effect a high resolution map must be made. By creating an explicit pass for this specific shadow, the other shadow-casting lights can remain at default settings or whichever settings desired. As a final note on light rays, it's important to tune light intensity and smoke density so that the volume's color does not washout the casting shadow. Figure 06 displays a atmospehre pass where spheres intercept a light ray. |
|
|
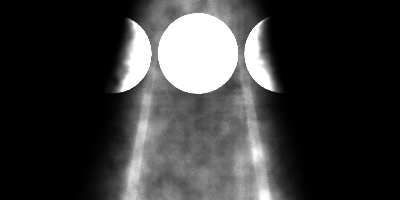
Currently we have a strong shaft of light. Another aesthetic made possible with smoke.sl is an illusion of smoke illuminated by the light ray. Smoke.sl provides several parameters that allow manipulation of smoke. But before going that far, first navigate to the light color parameter of the light source and insert any float pattern. Renderman provides patterns like cell noise and worley. However, Maya has a a very conventiently named pattern called Volume Noise. Volume Noise and adjustments to smoke.sl parameters resulted in Figure 07. |
|
|
Finally, navigate to the Final/Beauty Render pass in Render globals, and under Extra Output Settings add Volume Interpretation. Note: Volume shaders are expensive in render time. For this reason and the ease of tweaking in 2d, atmosphere effects should be a seperate pass from the beauty and composited. Having a zdepth pass as a matte provides even more adjustment in post. |
|