|
|---|
![]()
Z Brush Guides, Methods, and Tricks Z Brush Tool to Renderman for Maya and Mental Ray |
|---|
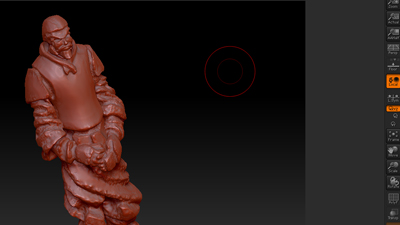
Figure 01 shows the .ztl file desired for rendering in RfM. This tool consist of over 9 million polygons and will easily stress the hardware. |
|
|
|---|---|---|
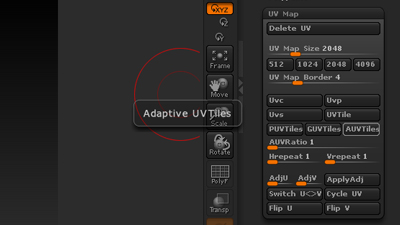
This is not acceptable for the 3D environment. A displacement map must be written to hold the fine detail, and the lowest subdivision level will act as the geo primitive. First, if the tool does not include a UV map, one can be written in Z Brush's UV Map parameter. Tool > UV Map (Figure 02). From my trial and error, Adaptive UV Tiles produce the greatest amount of accuracy converting .ztl to displacement map. |
|
|
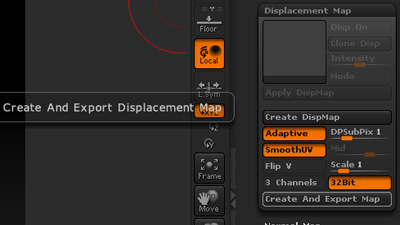
With a UV Map in existance, displacement maps can be written. To achieve a seamless displacement map for renderers, activate Adaptive, SmoothUV, and 32Bit parameters. Renderman can read 32bit Tiff files, so take advantage of the additional float range with this file type. The Create And Export Map button will generate the desired displacement map. Best to store the output in the Maya project's working directory. As we will look for it later. |
|
|
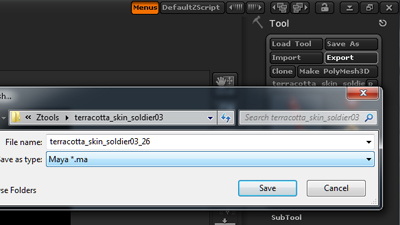
For the Mental Ray method, export as the maya ascii format (figure 04). This will export a 16bit tiff for displacement. With ZBrush 3.5r3 and up, the export .ma method is effective for Mental Ray rendering . A displacement map and mesh output complete the work with ZBrush. Next launch the Maya scene. |
|
|
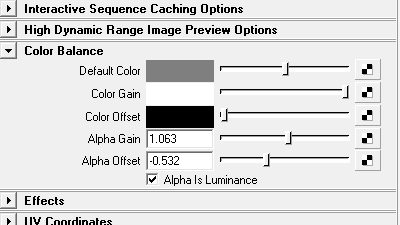
For MR method, the .ma format imports the mesh, and attaches a default shader network to it as well. Ideal for Mental Ray method. This shader network consist of a Maya Blinn surface shader for surface qualities and a functioning Maya displacement node for the displacement. The black to white ratio - alpha gain and alpha offset - within the Maya displacement node is predetermined by the software (Figure 05), and is ready to render. |
|
|
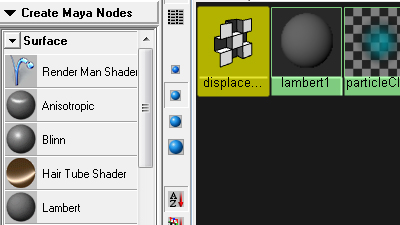
Instead of using a .ma format mesh's default shading network, a Renderman shading network has to be written. SLIM is used for node based shader creation instead of Maya's Hypershade workspace. Add a RM Shader to the hypershade library (Figure 06). A .tex format of the map can be plugged into the string parameter of the displacement node. |
|
|
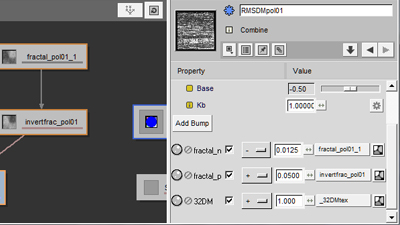
The Combine node's Kb and Base parameters are effectively the equivelent of a maya node's gain and offset. With the maya displacement node, alpha gain(x) and alpha offset(y) had a ratio established as y = - 0.5x The same formula works for the RMAN displacement node, and from trials and testing: x = 1 always. Add this displacement node to the Maya scene and attach it to the mesh primitive. |
|
|
|
With the displacement node in place the asset is ready for render (Figure: 08). |
Figure 08: ZBrush Mesh & Displacement Rendered with RfM |